Connecting to your new Ubuntu-Debian VPS
We are using Ubuntu 16.10 for this tutorial. This should work for all Ubuntu or Debian distributions. The only way to connect to a new server is through SSH. There is no control panel set up yet because it’s new. Your hosting provider should have sent you a password and an IP number to log on with. Make sure you have those 2 pieces of info and you can connect through your free Putty SSH program. Download and run Putty and you will be greeted with this screen:
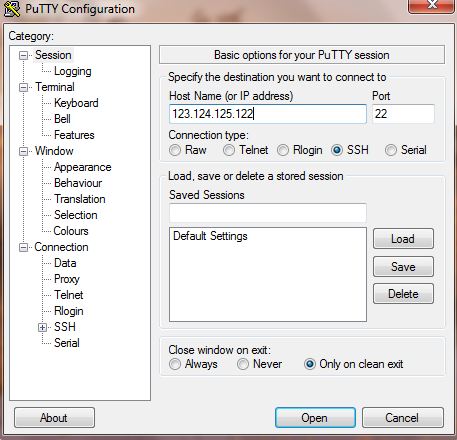
Type the IP number your host gave you into the “Host Name (or IP address)” box. Be sure to keep all the periods in between the numbers. Now press the “Open” button and you should be greeted by a black window like below. If it didn’t connect make sure you typed in the correct IP number with all the periods between the numbers and nothing after the last number.
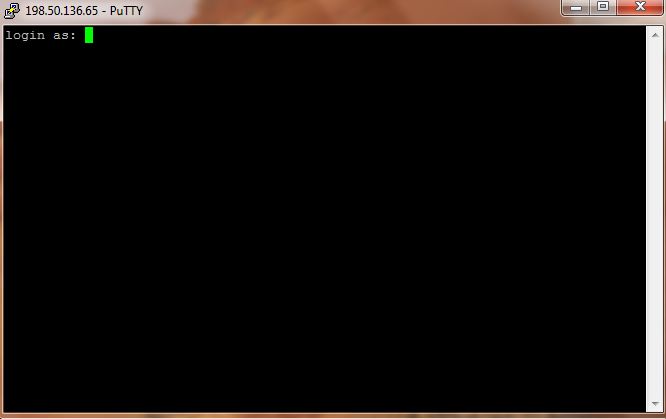
Login as “root” without the quotation marks and press the enter key on your keyboard.
Next enter the password your host provided you and press the enter key on your keyboard.
Now you are connected to your VPS and have absolute power and control. It’s good to update everything before you start, so type or copy and paste without the quotation marks: “apt-get -y update” .When that is done type : “apt-get -y upgrade” without the quotation marks. This will update everything with the most recent packages and patches for security and smooth operation. After it finishes updating we will add a free control panel. I like Webmin control panel. It’s free and easy to install.
Type: ” apt-get install perl libnet-ssleay-perl openssl libauthen-pam-perl libpam-runtime libio-pty-perl apt-show-versions python ”
without the quotation marks. That installs all the dependencies that Webmin needs to run.
Type or cut and paste ” wget http://prdownloads.sourceforge.net/webadmin/webmin_1.831_all.deb ”
without the quotation marks. This downloads the Webmin package to your server so we may install it.
Then type: ” dpkg –install webmin_1.831_all.deb ”
without the quotation marks.
This will typically take a few minutes .
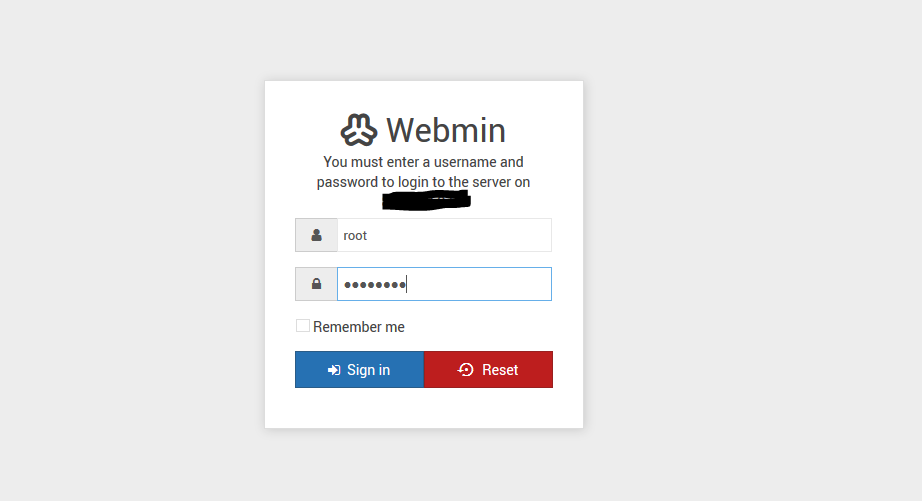
When that gets done installing you should be able to login to your new Webmin control panel by going to https://yourIPnumber:10000/ . You will most likely get a page that says the new connection is untrusted, ignore it, you just made that certificate. Your username is ” root ” and the password is the root password to your VPS that your host gave you. Remember to bookmark this page.
You can log out of your Putty SSH client by typing Ctrl-D . We won’t be needing that any more.

After logging in to Webmin you should see a page like above that gives information about your VPS or server.
This is the control panel for your VPS. You can control virtually every aspect of your VPS from here.
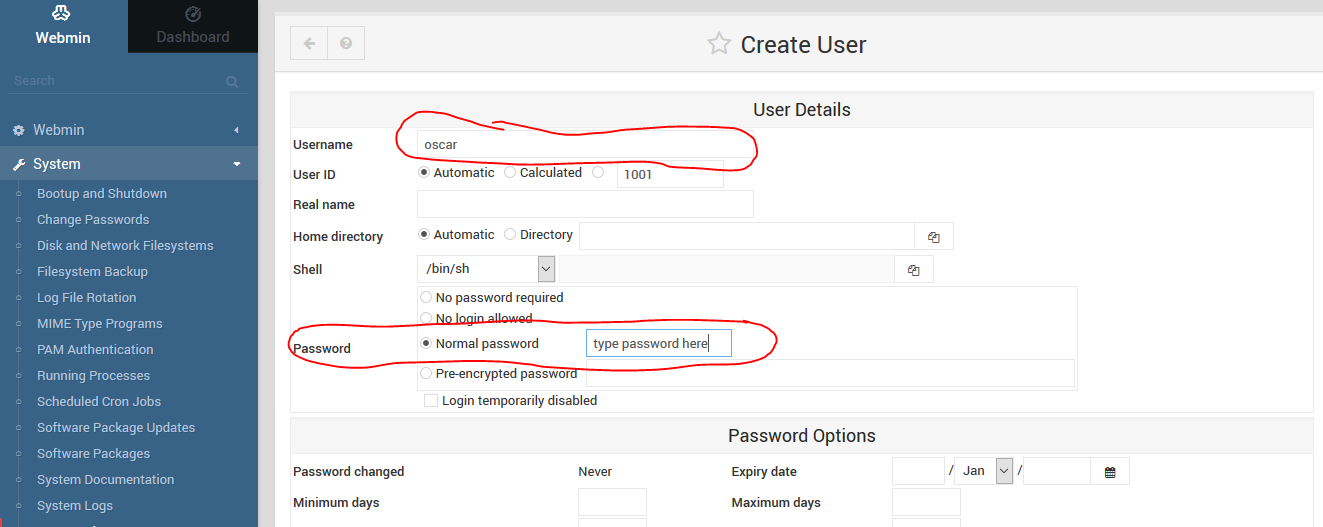
Now we want to create a user account other than root. We will now create a user account for our self. We will call this user “Oscar” you may use any name you like. Go to the left hand side of the Webmin page and click “System”. Then click “Users and Groups”.
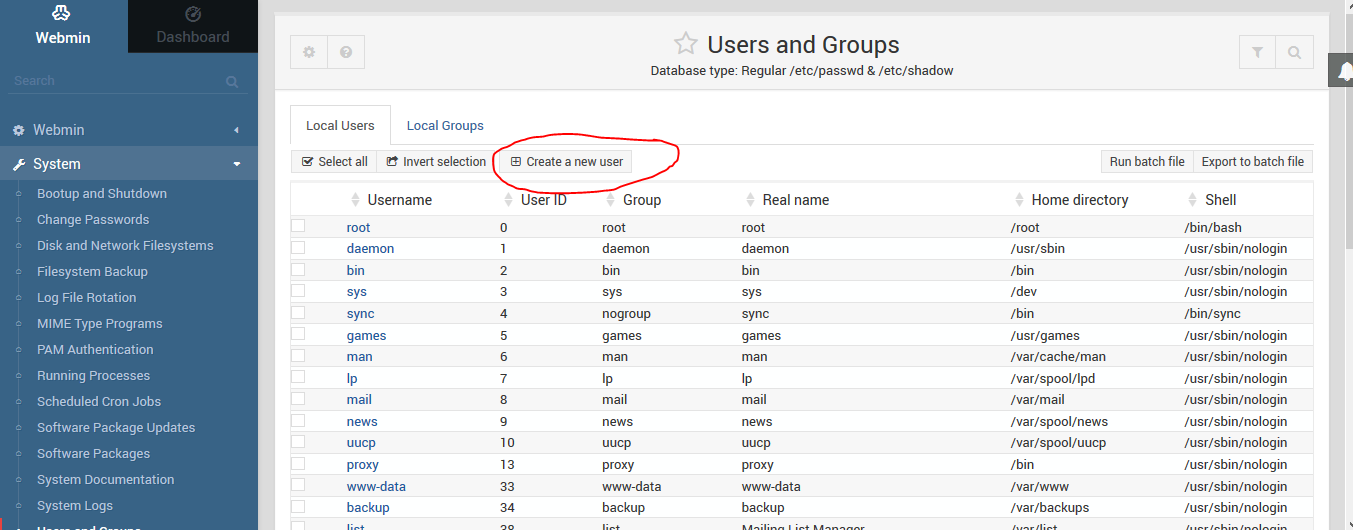
Click “Create a new user”.
Type in the username you would like to create, in our case “Oscar”. Capitalization has to be the same always and counts, (case sensitive) so remember if you use upper-case letters. Select “Normal Password” and type in the password you would like your new username to have. Leave everything else the way it is and scroll to the bottom of the page and click the “Create” button. You will need to remember this username and password, so be sure to put it in a safe place.
Now we will configure the SSH server so that it will not allow user “root” to login. Go to the menu on the left in Webmin and click “Servers” then ” SSH Server “. Your should be at a page that looks like this:
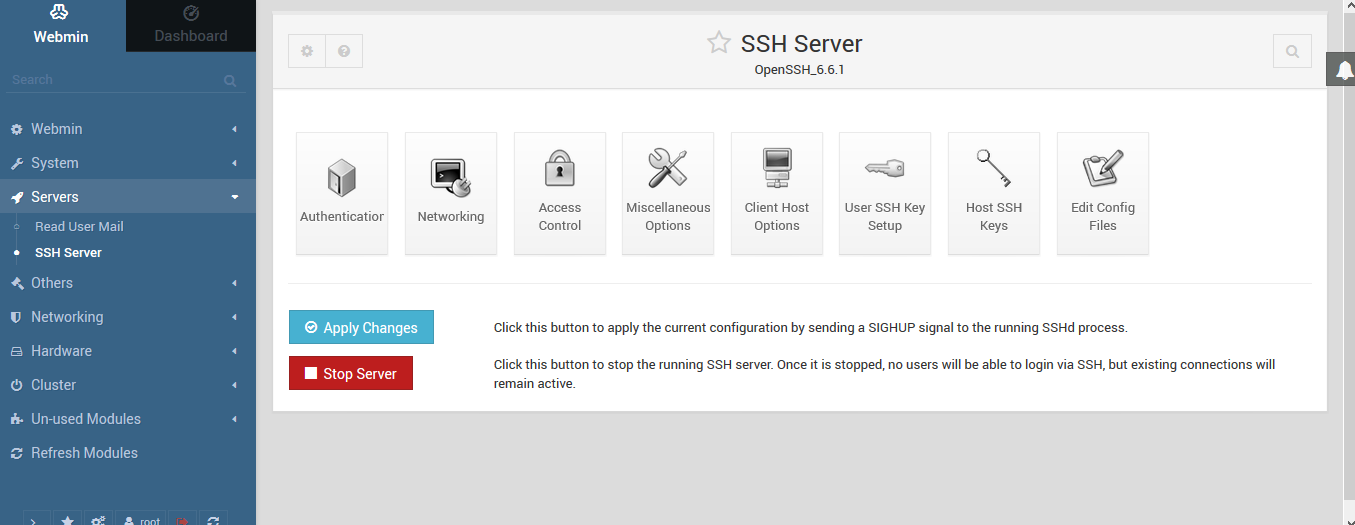
Click the “Authentication” icon and set “Allow login by root?” to “no” , click the “Save” button. Now click the “Apply Changes” button.
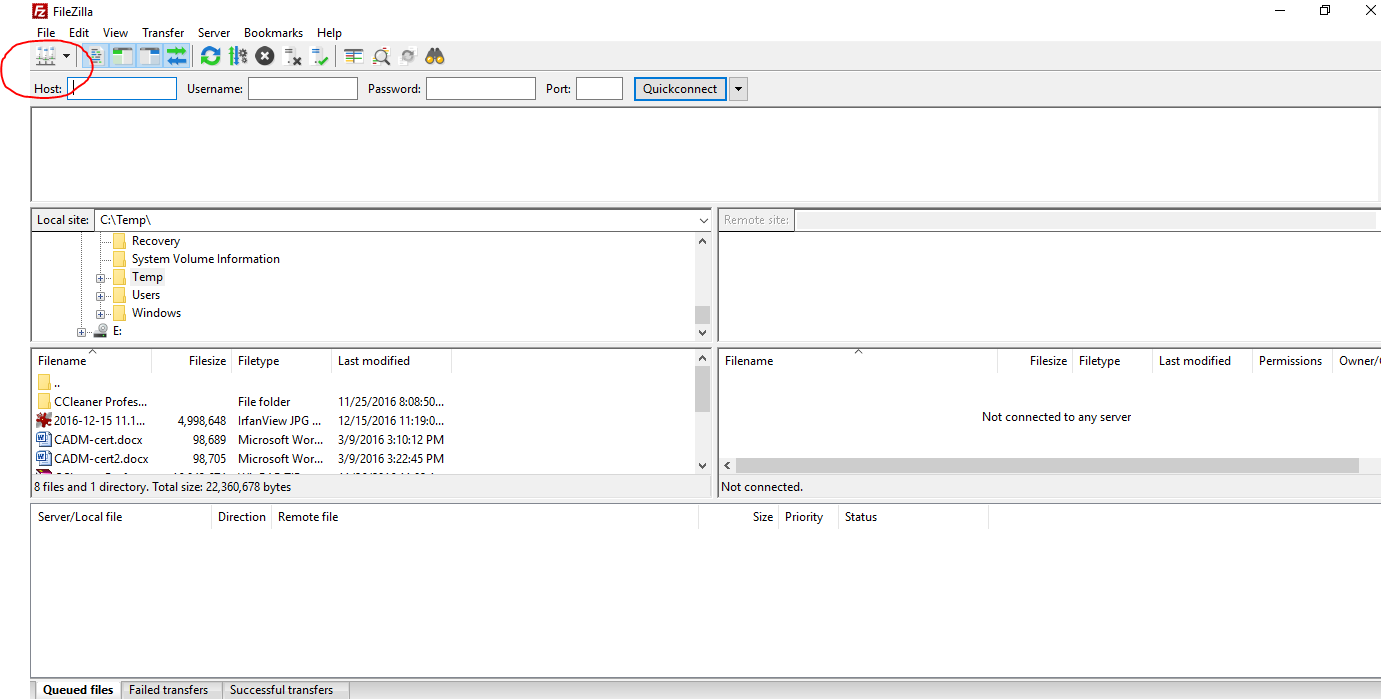
You can also connect to your server with SFTP to transfer files to and from your server. Download and install the Filezilla client, not the server, on your computer.
Open the Filezilla program you just installed and click the Open Site Manager icon near the top left of the window.
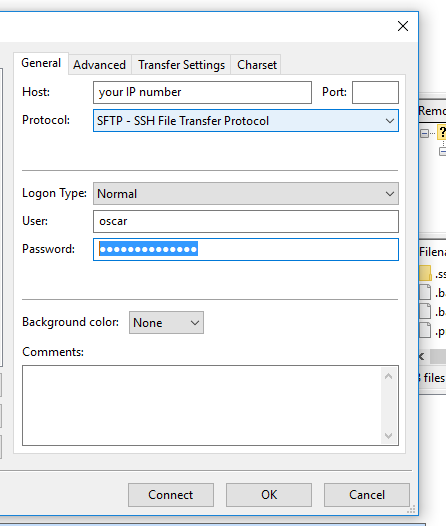
When the Site Manager pops up fill in the “Host” field with the IP number your host sent you.
For “Protocol” select “SFTP – SSH File Transfer Protocol”
For “Logon Type” select “Normal”
Enter the username and password you created a few steps back. Don’t try to login as root because we blocked root login in the previouse step.
When the program connects you will be presented with this screen:
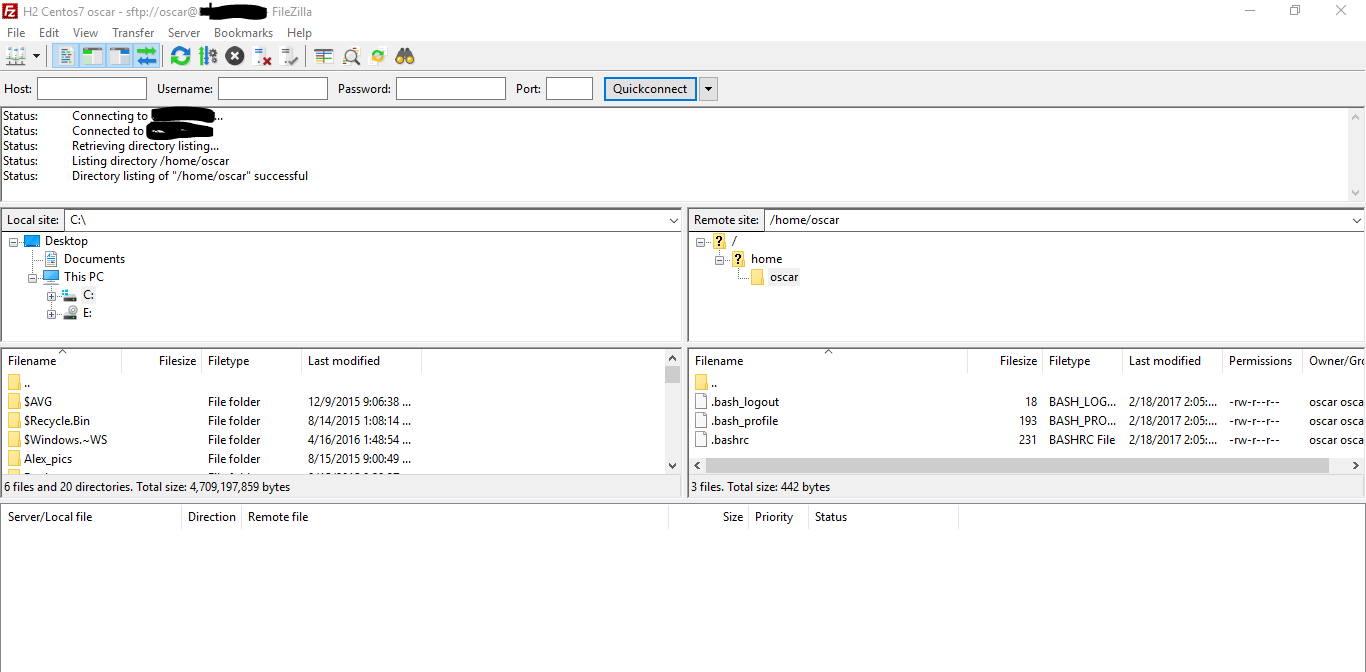
The left side of the program is the contents of your computer. The right side is the contents to your home folder on your server. You can transfer files back and forth by dragging and dropping or righ clicking and selecting your desired action from the menu.
If everything has gone well, you can now login by both SFTP and SSH with your new Username and Password and not through your root password. This is done for security reasons. Also you can login to your server with the Webmin control panel.