How to make a MYSQL database
This is a tutorial to make a new MYSQL database with Webmin and the Centos 6 operating system. You should already have MYSQL and PHP installed, if you need to do that you can go to this tutorial and come back here when you’ve got everything installed.
We will be making a database and a user so we can run WordPress, Joomla or any other application that needs a database.
Open your Webmin control panel and go to Servers==>MySQL Database Server:

Click ” Create a new database. ” Fill in the name of your database. We are creating a database named “example” for the purposes of this tutorial.
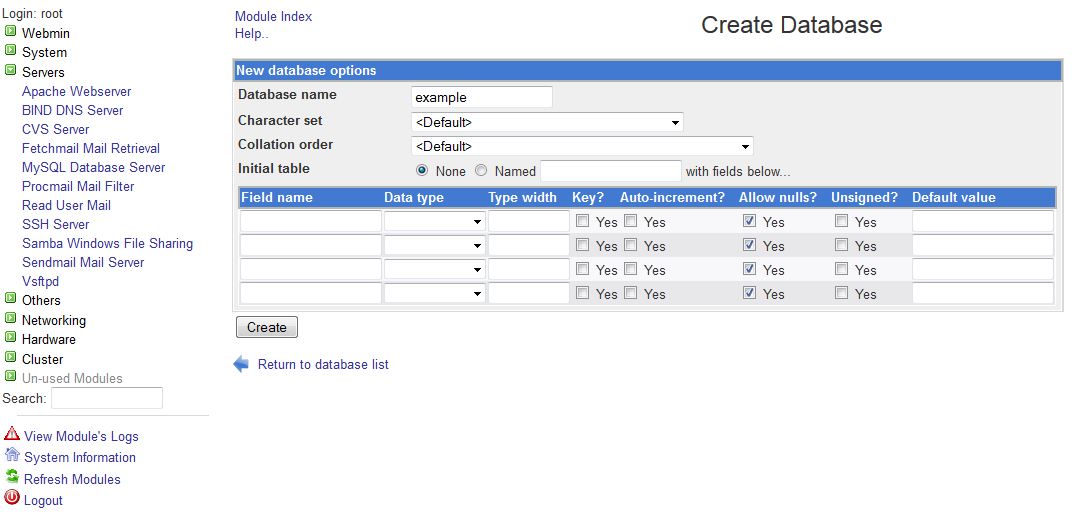
Click the “Create” button. You should now have a new database. We need to create a user, so click the ” User Permissions” Icon.

Click the “Create new user.” link ate top of the page. We will be making a new user “oscar” for the purpose of this tutorial . Fill in the username of the use you wish to create and click the ” Set to” field in the Password part and make a password for your MySQL user.
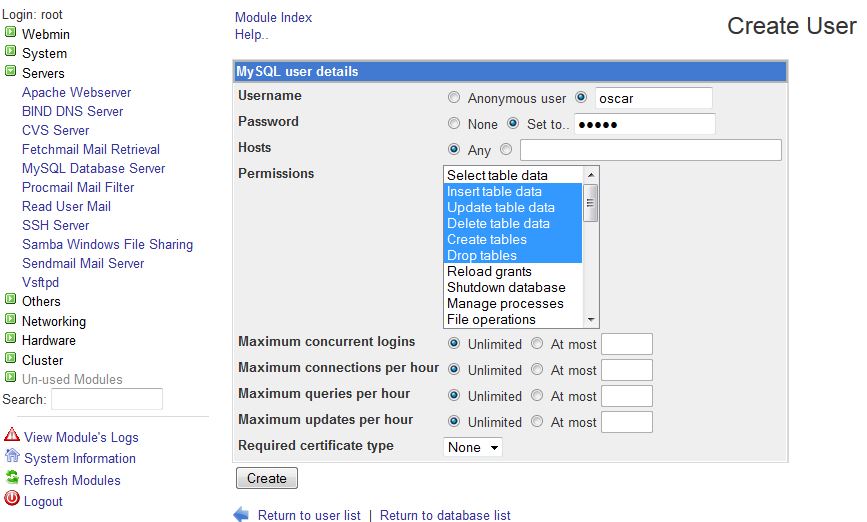
A normal MySQL user does not need to have all the permissions as the root user and it is a security problem to give this user too many permissions. Select just down to “drop Tables” on the ” Permissions ” field, that should be enough for Joomla or WordPress. Now click the “Create” button and give yourself a nice pat on the back. Go have a beer, it’s been a hard day.
Leave a reply
You must be logged in to post a comment.