How to make a MySQL database with Webmin and Ubuntu
This tutorial will illustrate how to make a MySQL database and user with Webmin and Ubuntu 12.10 . It is assumed that you already have MySQL and PHP installed and running along with Webmin control panel.
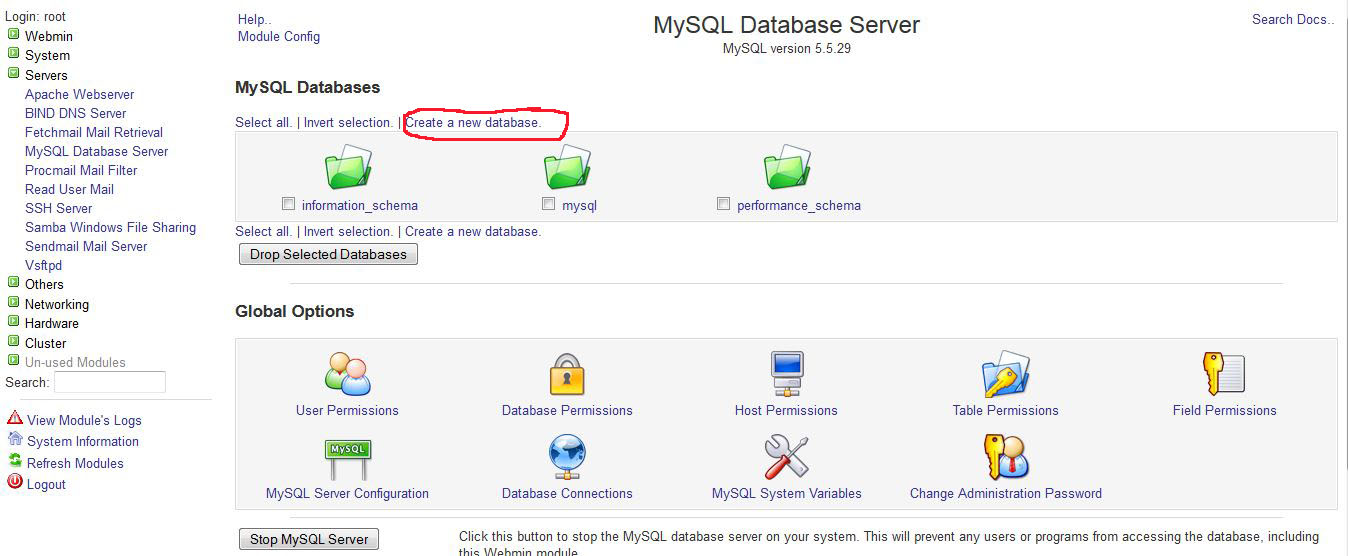
Login to your VPS or server with your Webmin control panel and go to Servers ==> MySQL Database Server . Click the ” Create a new database ” link.
In the “Database name“ field input the name of the database you wish to create. In this tutorial we are creating a database named “example” .
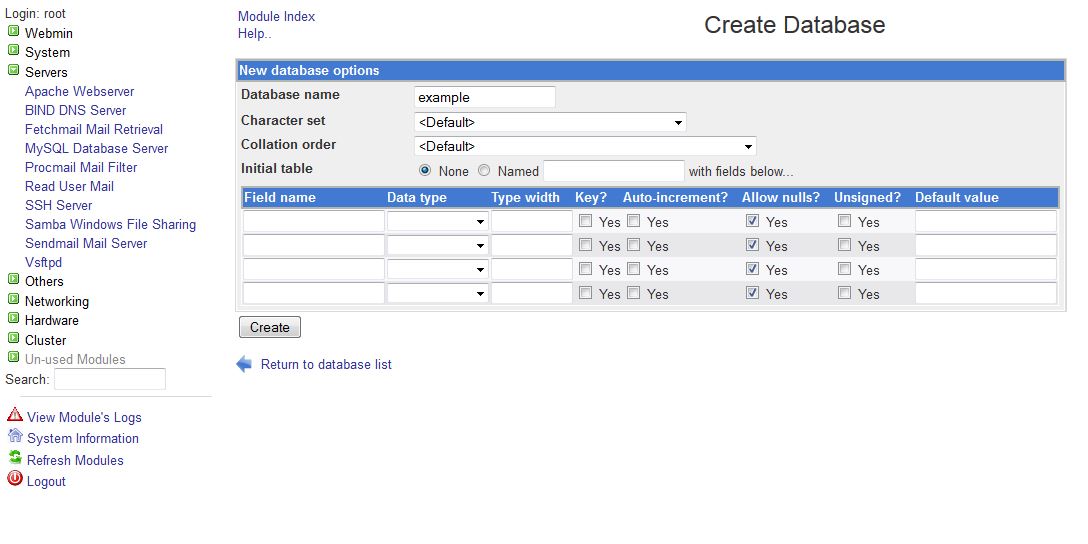
Leave everything else the way it is and click the “Create” button. You now have a new Mysql database. Most scripts like WordPress and Joomla require you to have a user for the database, so we will now create one. Never use root as your user. Click the ” User Permissions ” icon.
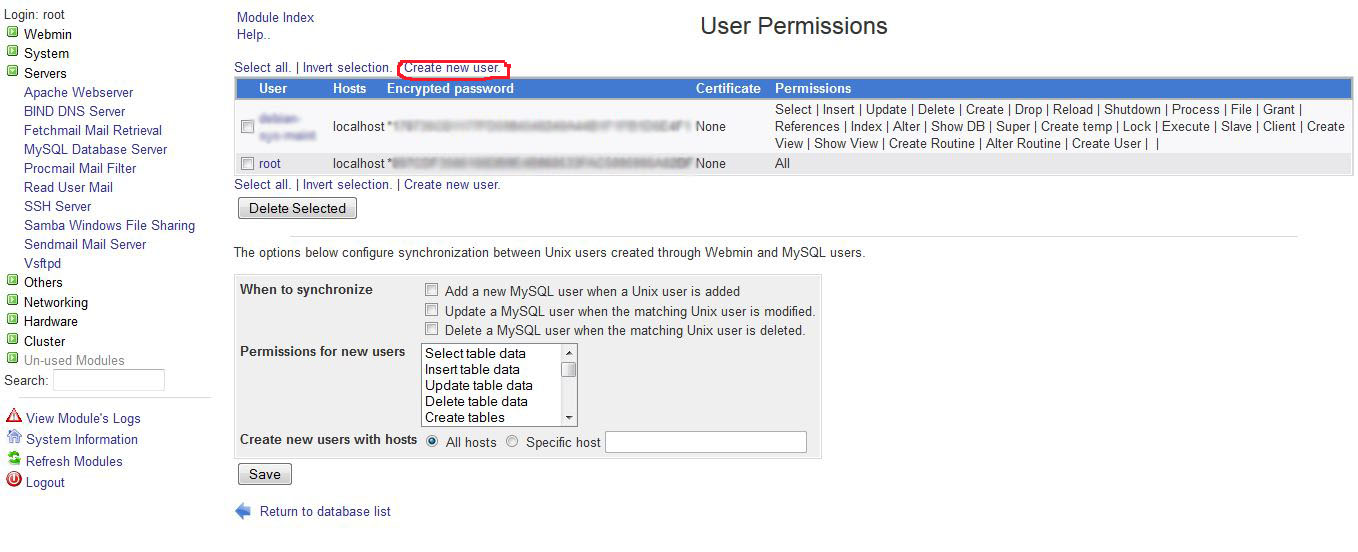
Click the ” Create new user. ” link.
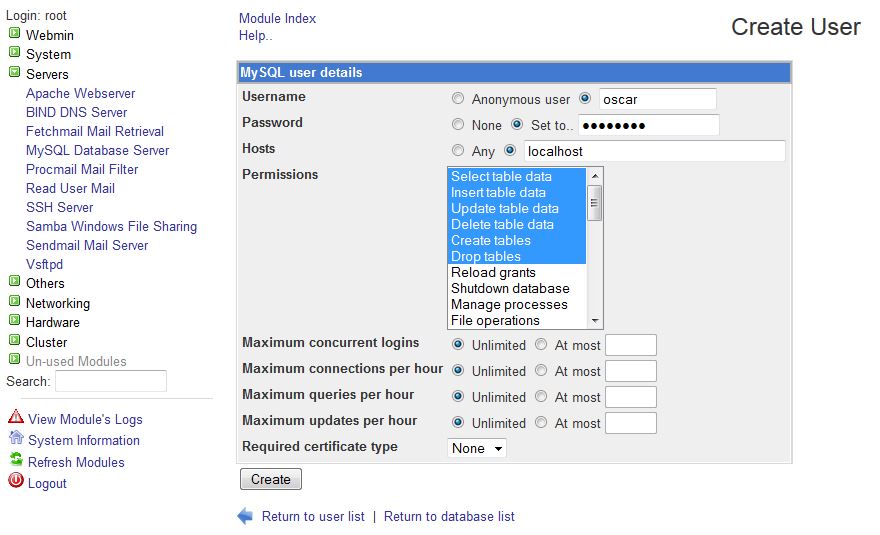
We will be creating a new user “oscar” for this tutorial. In the “Username” option, select the blank field and type in the user name you would like to create. For the “Password” option select the “Set to…” field and type in the password you would like this user to have. For the “Hosts” option select the empty field and type in “localhost” . For the “Permissions” option give your user permission for the first 6 tasks, like the picture above. “Select table data, Insert table data, Update table data, Delete table data, Create tables and Drop tables” . It is unwise for security reasons to give users too many permissions.
Click the “Create” button.
Stop and start MySQL with the “Stop MySQL Server” button.
You now have a database, user and password for anything you need to do like WordPress, Joomla, a bulletin board etc…
Leave a reply
You must be logged in to post a comment.