How to set up a nameserver
If you already have your domain being pointed to your IP number by your registrar or host you don’t need to set up Bind. You only need to set up Bind if you need to create your own nameserver. You will need to create the nameserver with your registrar and tell them what IP numbers you want to use. You must give at least 3 unique IP numbers when registering your nameserver. One IP number for ns1.domain.com , one for ns2.domain.com and one for domain.com
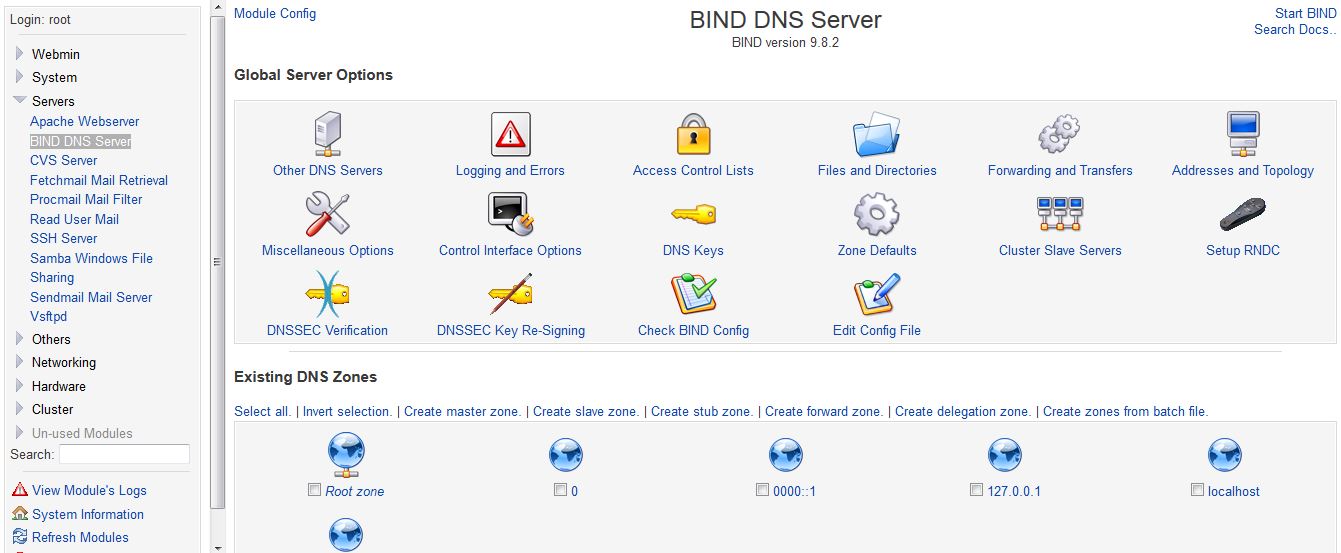
Go to your Webmin control panel and sign in. Click the “Servers” link, then select the “BIND DNS Server” link . If Bind is not installed click the link that says yum will install it for you. You should be at the main Bind DNS Server page now.
Click the “Miscellaneous Options” icon:
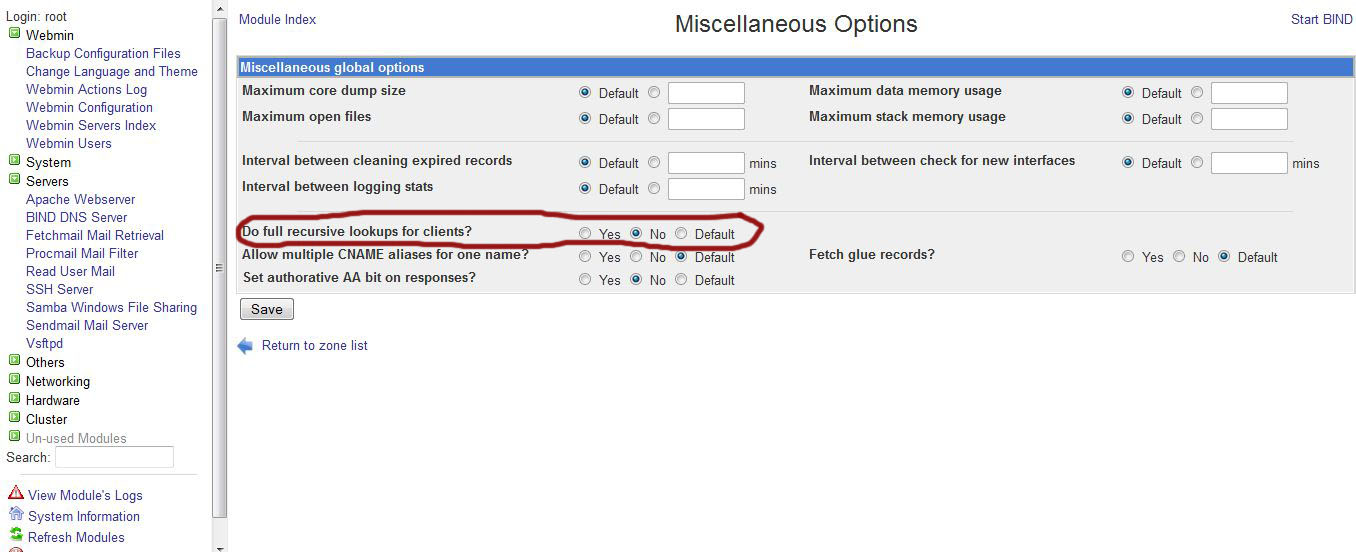
Go to the “Do full recursive lookups for clients?” option and select “No” like the picture above. Click the “Save” button
Click the “Create master zone.” link

Enter the domain into the “Domain name / network” box.
Enter the domain into the “Domain name / network” box.
For the master server, type in the domain name as well.
Check the “Create NS record” box.
Enter your email address in the appropriate box.
Type in the IP address of the server, the domain.com number(The external IP address provided by your ISP).
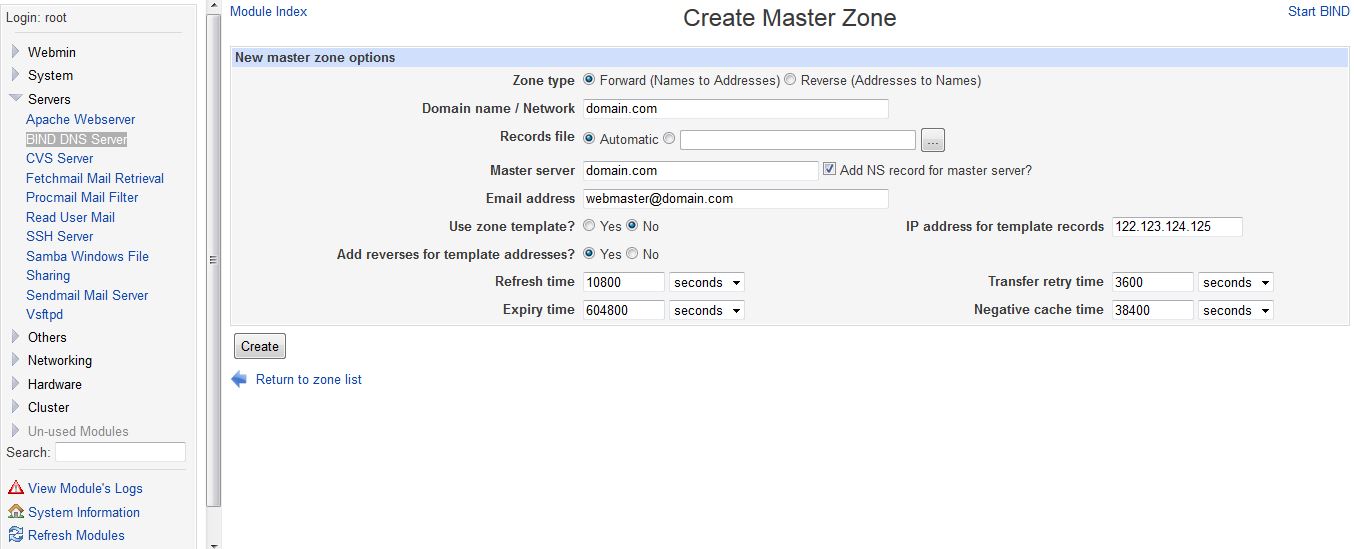
Click the “Create” button.
You will then be redirected to the zone page for that domain you just created. (If you weren’t, click on the zone for that domain).
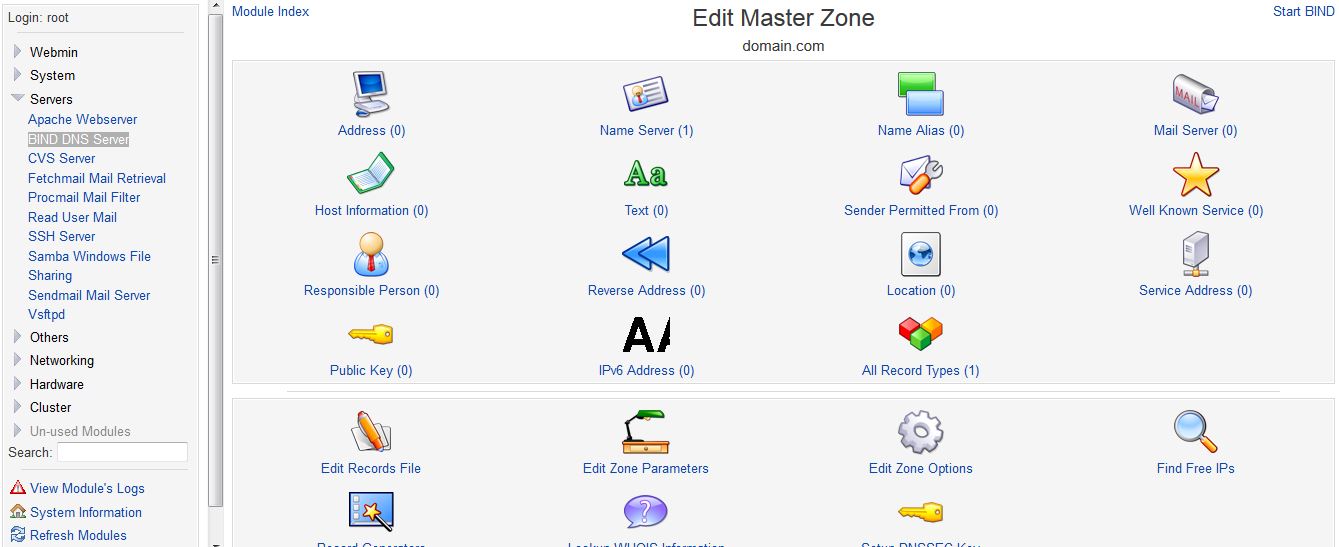
Click on “Address”
Leave the name field blank, and type in the IP address.

Click the “Create” button.
Type in www for the name, and type in the IP address.
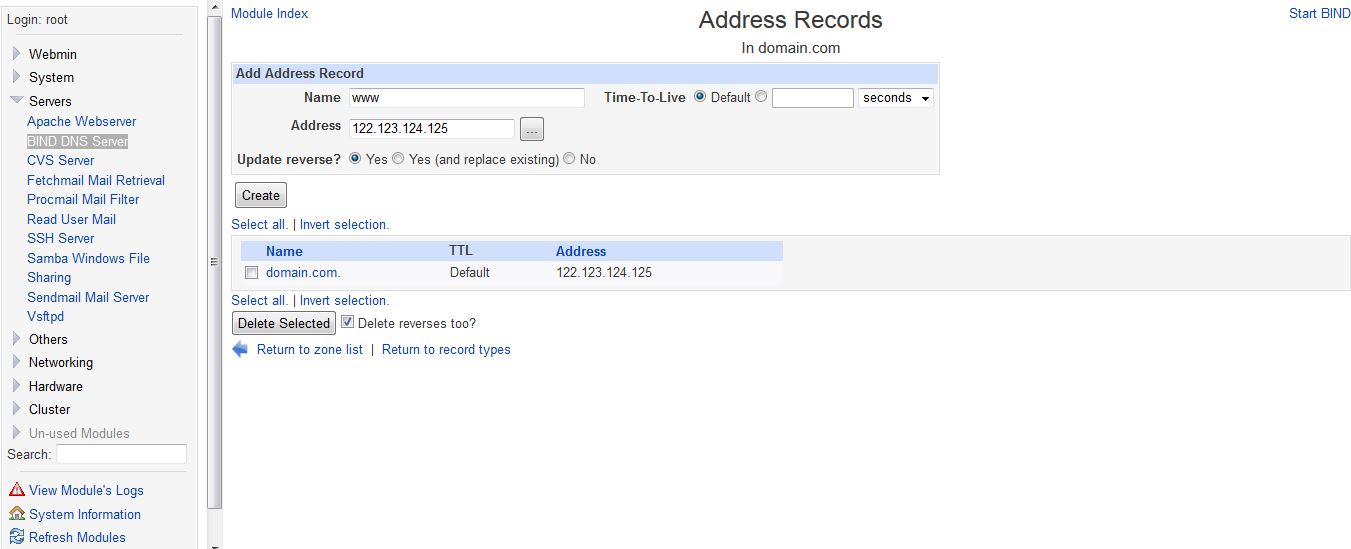
Click the “Create” button.
Type in mail for the name, and type in the IP address.
Click the “Create” button.
Type in ns1 for the name, and type in the IP address.
Click the “Create” button.
Type in ns2 for the name, and type in the IP address.
Click the “Create” button.
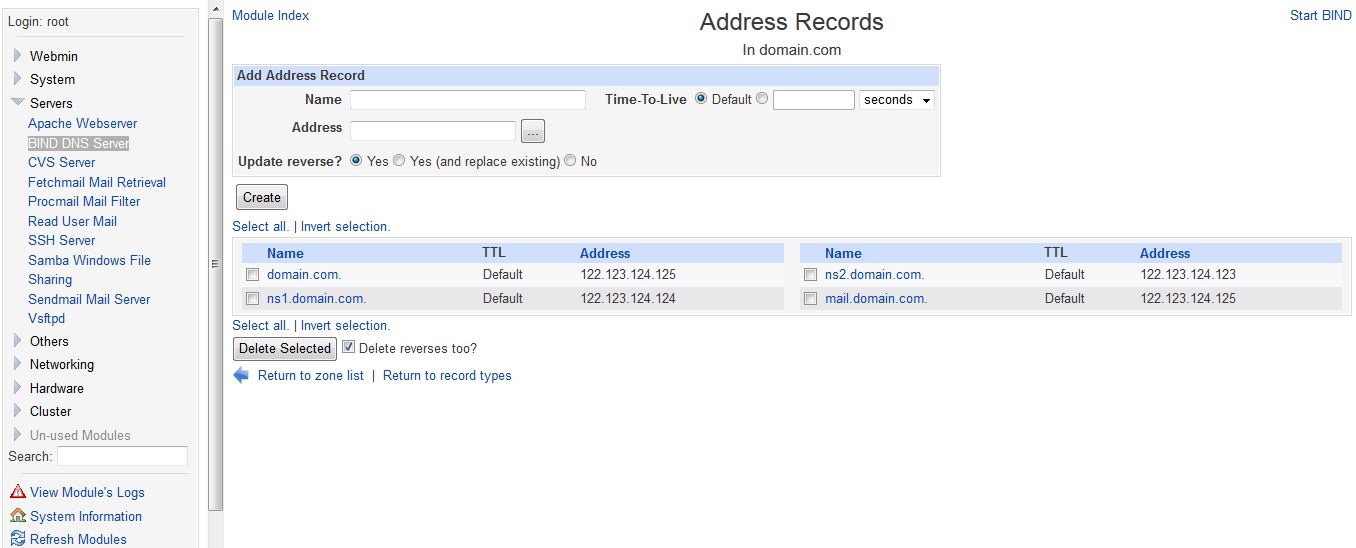
At the bottom, click the “Return to Record Types” link.
Click on the “Name Server” icon
For the zone name, type in the domain name (Put a . at the end; for example:
domain.com. )(notice the ending period.. DO Not Forget that)
For the name server, type in ns1.domain.com.
(Also notice the period)

Click the “Create” button.
Do the same for ns2 , don’t forget the period .
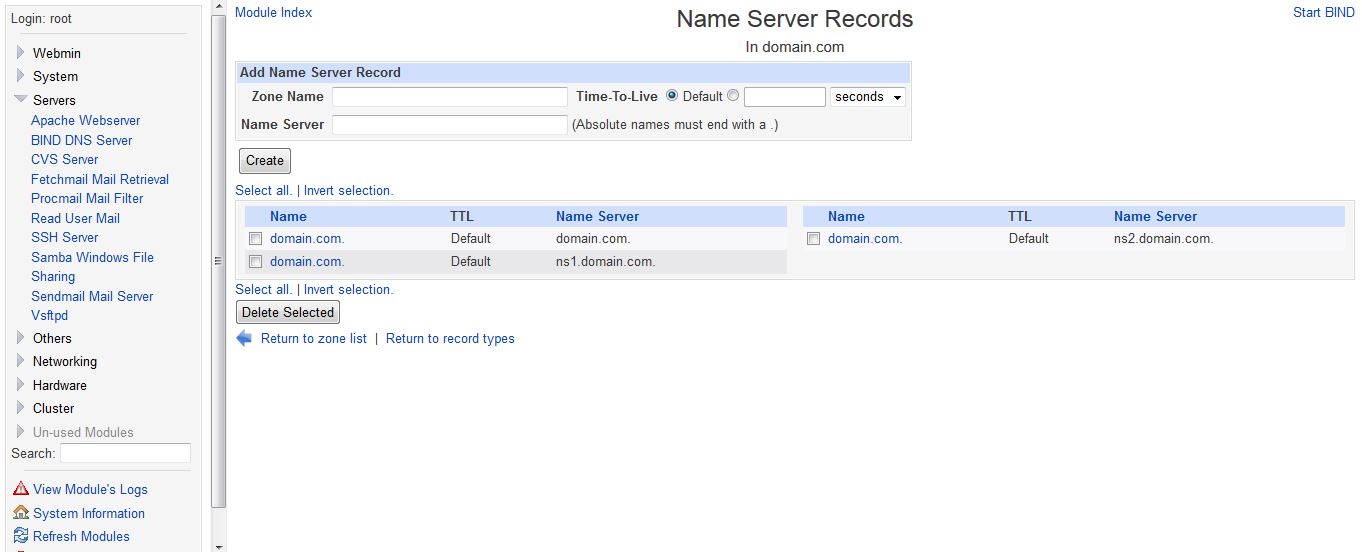
Click the “Return to Record Types” link.
Click the “Mail Server” icon.
For the name, type in the domain.com. (don’t forget the period at the end)
For the mail server, type in mail.domain.com. (don’t forget the period at the end)
Set the priority to what you like.. 10 is usually default.
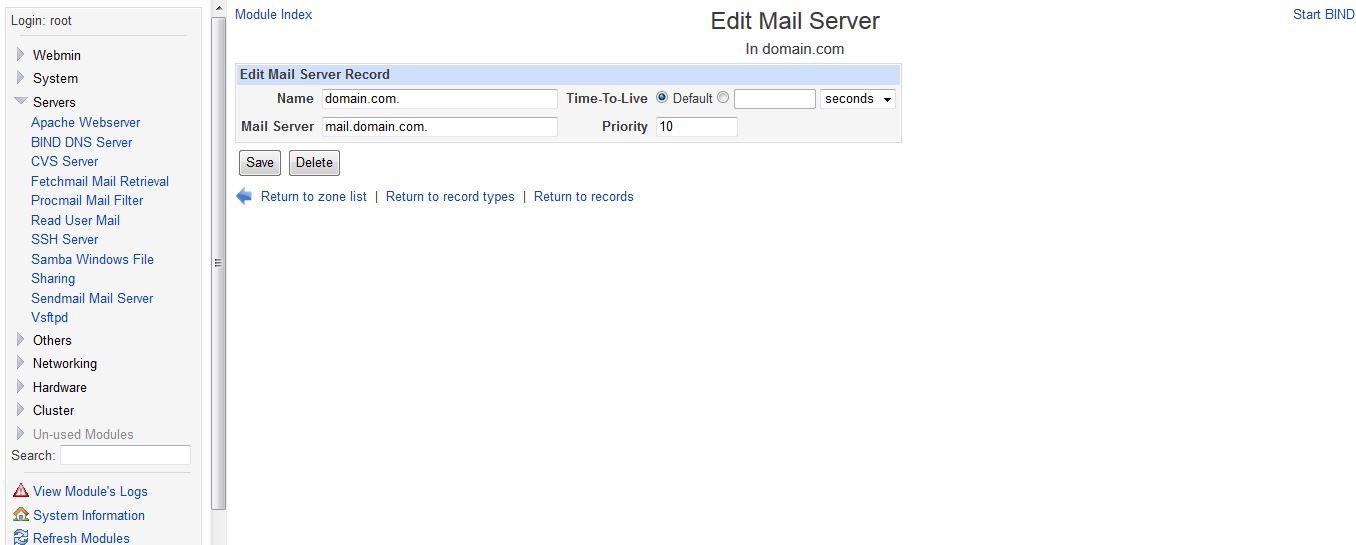
Click the “Create” button.
Click the “Return to Record Types” link at the bottom.
Click the “Start Bind” link at the top right, or the “Apply Configuration” link if Bind was already started. You now have a fully configured nameserver.
Leave a reply
You must be logged in to post a comment.